I’m a bit behind the times, but this post from Programming Praxis intrigued me enough that I kept it in my todo list for rather a while. So let’s get around to it.
I’ll just copy the description straight from the Programming Praxis website (although there are at least two previous version:[1][2]):
There is a monkey which can walk around on a planar grid. The monkey can move one space at a time left, right, up or down. That is, from (x, y) the monkey can go to (x+1, y), (x-1, y), (x, y+1), and (x, y-1). Points where the sum of the digits of the absolute value of the x coordinate plus the sum of the digits of the absolute value of the y coordinate are lesser than or equal to 19 are accessible to the monkey. For example, the point (59, 79) is inaccessible because 5 + 9 + 7 + 9 = 30, which is greater than 19. Another example: the point (-5, -7) is accessible because abs(-5) + abs(-7) = 5 + 7 = 12, which is less than 19. How many points can the monkey access if it starts at (0, 0), including (0, 0) itself?
I’m going to take a slightly different take since the problem itself isn’t that terribly difficult; it’s mostly a matter of optimization. You can never go past 300 on either axis since 2+9+9 = 20, so that forms a wall. ~360,000 nodes can be checked rather quickly to begin with and you can further optimize that by only checking a single quadrant because we’re always taking the absolute values. But ignore all that. First, we want to actually write the function. And to that, we want to make up a brand new data structure:
(define (make-infinite-grid)
  (make-hasheq))

(define (infinite-grid-ref grid x y [default (void)])
  (hash-ref (hash-ref! grid x (make-hasheq)) y default))

(define (infinite-grid-set! grid x y value)
  (hash-set! (hash-ref! grid x (make-hasheq)) y value))
Check out the source for a few more helper functions: GitHub: jpverkamp/small-projects/monkey-grid.rkt
Essentially, it’s a Cartesian grid that can stretch off arbitrarily far without having to pre-allocate the memory and without dealing with the pesky problems of manually doing the nested hashes all of the time. Granted, this particular problem will be pretty dense, so something more like an extensible quadtree might have worked better, but this is what I went for first.
So that being said, how do we want to approach the actual problem?
My first thought was that we’re working in Racket. We should abstract it over the actual generating function, because first order functions are awesome. So we can solve the problem for any sort of function, just just the given one.
My second thought was let’s just do it:
(define (monkey-grid-df rule)
  (define grid (make-infinite-grid))
  (let loop ([x 0] [y 0])
    (cond
      ; We've already visited this point, skip it
      [(boolean? (infinite-grid-ref grid x y))
       (void)]
      ; The monkey can walk here
      [(rule x y)
       (infinite-grid-set! grid x y #t)
       (loop (- x 1) y)
       (loop (+ x 1) y)
       (loop x (- y 1))
       (loop x (+ y 1))]
      ; The monkey cannot walk here, skip it
      [else
       (infinite-grid-set! grid x y #f)]))
  grid)
Here we have a nice depth-first searchthat will set each point that the monkey can reach to true (the second case) and ones it cannot to false (the third). The first case there is to stop the monkey from moving west then immediately east again. Once we’ve visited a point, we’ll not recur from it again. We’ll still visit points up to five times (the original time and potentially once coming back from each direction), but writing this way is much cleaner than checking before you move.
So how does it work? Well, let’s write a quick function to visualize an infinite grid:
(define (infinite-grid->bitmap grid mapping [default (void)])
  (let-values ([(min-x max-x min-y max-y) (infinite-grid-range grid)])
    (flomap->bitmap
     (build-flomap*
      3 (- max-x min-x) (- max-y min-y)
      (λ (x y)
        (mapping (infinite-grid-ref grid (+ x min-x) (+ y min-y) default)))))))
This is basically the same technique that we used to draw noise in the Perlin/Simplex noise post and the technique used in the Wombat (c211 image) library. In this case, we pass a generating function tobuild-flomap*
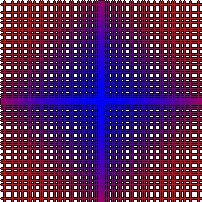
that returns the color at each point. Using a simple coloring where #t is red, #f is black, and (void) (the points we don’t visit) is white, we get this:
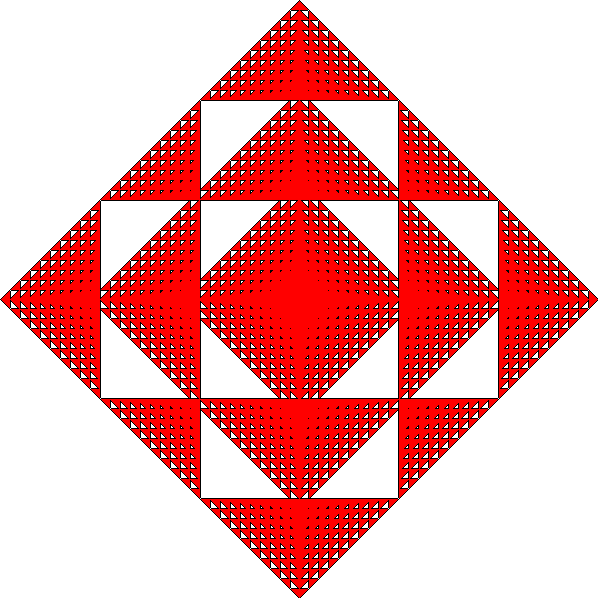
That’s actually a pretty cool looking image. If you think about it, the triangular patterns make perfect sense. The sides are where the digits of x or y are pushing the total over 19 while the angle in between is where the combination matters. And of course since we’re taking absolute values, the entire thing is mirrored over both the x and y axes (the output is automatically scaled the same way the (c211 turtle) library is).
If that’s all there was to it though, this would be a pretty boring post though. So let’s take it up a notch.
I mentioned earlier that this is a depth first solution to the problem. That means that we’re going to completely exhaust each approach, then back track point by point and keep branching out. In this case, we’re looking at (x-1, y) first, so we’ll first build the left side of the image. But how can we visualize this?
One option would be to count the number of steps that we’ve taken and allow the function to bail out early. That way we can generate several images and watch as the entire picture is filled in. Something like this:
(define (monkey-grid-df rule [maximum-steps #f])
  (define grid (make-infinite-grid))
  (define steps (make-parameter 0))
  (let loop ([x 0] [y 0])
    (cond
      ; We're out of steps or points
      [(and (number? maximum-steps) (>= (steps) maximum-steps))
       (void)]
      ; We've already visited this point, skip it
      [(infinite-grid-ref grid x y #f)
       (void)]
      ; The monkey can walk here
      [(rule x y)
       (steps (+ (steps) 1))
       (infinite-grid-set! grid x y (steps))
       (loop (- x 1) y)
       (loop (+ x 1) y)
       (loop x (- y 1))
       (loop x (+ y 1))]
      ; The monkey cannot walk here, skip it
      [else
       (infinite-grid-set! grid x y #f)]))
  grid)
Intuitively, it would probably be more obvious to thread the number of steps through the loop as a variable, but that wouldn’t actually do what we want because the four branches don’t share state. We could have each call to loop return the number of steps it took, but then it wouldn’t be tail recursive, so we’d lose a bit in performance and make the code messier. So instead, we use aparameter
, giving us a variable with dynamicrather than lexicalscope.
Now we can generate a whole sequence of images (click any image to biggify):
| Steps | Image |
|---|---|
| 29 = 512 |  |
| 210 = 1,024 |  |
| 211 = 2,048 | 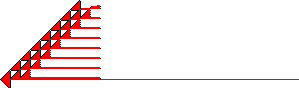 |
| 212 = 4,096 | 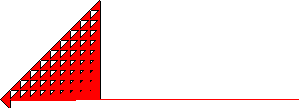 |
| 213 = 8,192 | 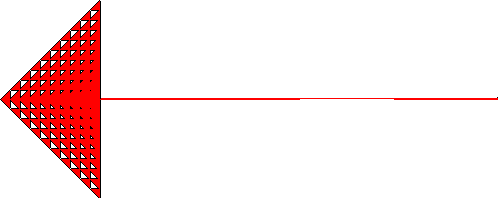 |
| 214 = 16,384 | 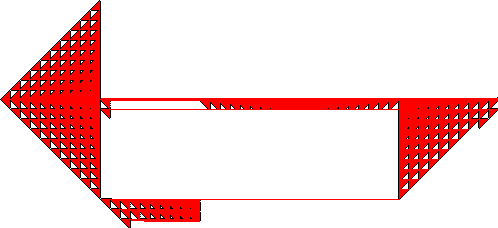 |
| 215 = 32,768 |  |
| 216 = 65,536 | 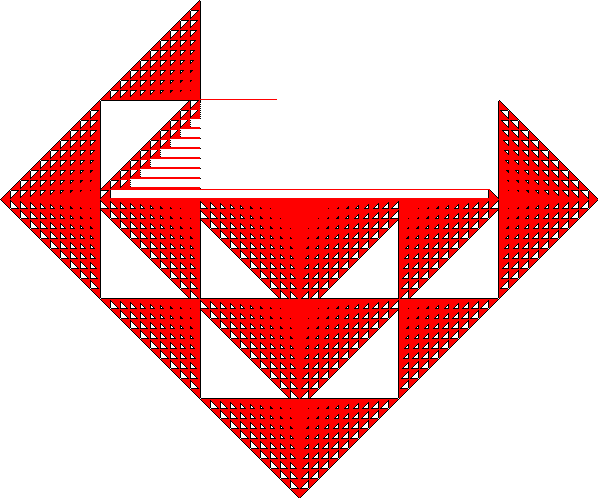 |
We start out by going to the left as expected. After we reach the far end (that 299 limit), we start filling out by right from there (which just doubles back so it’s skipped), then we go down and up to fill out that far left triangle. We see the right lines because we’ll move up/down and then have a space to go left (which has the second level of priority). From there, we just fill out the whole image.
This is all well and good, but couldn’t we fill it in from the inside out?
To do that, we need to take a different approach. Rather than a depth-first search, we want to go breadth-first. Essentially the idea will be to use a queue(so that the first points we think to study are the first we do rather than following a branch to the end) rather than the implicit stackwe get from recurring.
Here’s one way to do that:
(define (monkey-grid-bf rule [maximum-steps #f])
  (define grid (make-infinite-grid))
  (define steps (make-parameter 0))
  (let/ec return
    (let loop ([points '((0 0))])
      ; We're out of steps or points
      (when (or (null? points)
                (and (number? maximum-steps) (>= (steps) maximum-steps)))
        (return grid))

      ; Otherwise, unpack and process the next point
      (define x (first (first points)))
      (define y (second (first points)))
      (cond
        ; We've already visited this point, skip it
        [(boolean? (infinite-grid-ref grid x y))
         (loop (rest points))]
        ; The monkey can walk here
        [(rule x y)
         (steps (+ 1 (steps)))
         (infinite-grid-set! grid x y #t)
         (loop (append (rest points)
                       (list (list (- x 1) y)
                             (list (+ x 1) y)
                             (list x (- y 1))
                             (list x (+ y 1)))))]
        ; The monkey cannot walk here, skip it
        [else
         (infinite-grid-set! grid x y #f)
         (loop (rest points))]))))
We can already see that it’s going to be far slower since we’re appending to the end of the list (and maintaining the list explicitly in the first place), but it’s still worth doing from a learning perspective. The main odd part is let/ec
(it’s a short form of call-with-escape-continuation
), but basically that’s giving us an escape route. Once we’ve made enough steps, no matter where we are, we can stop recurring. So what would these in progress shots look like?
| Steps | Image |
|---|---|
| 29 = 512 |  |
| 213 = 8,192 | 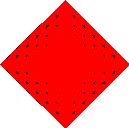 |
| 215 = 32,768 | 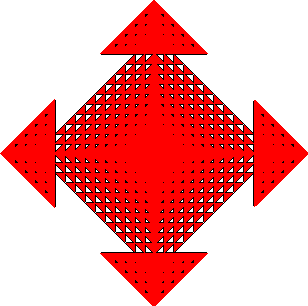 |
Exactly as expected, the image is built from the inside out. We process the first four points, then the nine from those and so on. Nice!
But generating all of these images is a bit of a pain. What if we could color them based on how many steps it took to get to them?The change is actually relatively minimal. First, store the number of steps rather than just #t in the grid. Second, we have to change the boolean? check (we can use the fact that numbers are true though). Finally, we need a slightly more complex coloring function:
; Store the number of steps in the grid
... (infinite-grid-set! grid x y (steps)) ...

; Don't revisit using the fact that numbers are true
... (infinite-grid-ref grid x y #f) ...

(define (make-gradient-coloring grid)
  (define max-value (apply max (cons 1 (filter number? (infinite-grid-values grid)))))
  (λ (value)
    (cond
      [(number? value)
       (define g (/ value max-value))
       (vector g 0 (- 1 g))]
      [else
       (vector 0.0 0.0 0.0)])))
make-gradient-coloring is interesting because it’s a function that returns the actual coloring function. We have to do this because we don’t actually know how many steps it took to generate the image (although we could easily restructure the function to return that). Then we use the gradient (g) and (- 1 g) to smoothly blend from blue at low step numbers to red at the highest.
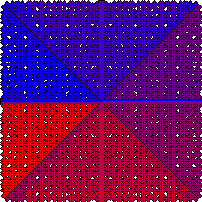
So, what does it look like?
| Depth-first | Breadth-first |
|---|---|
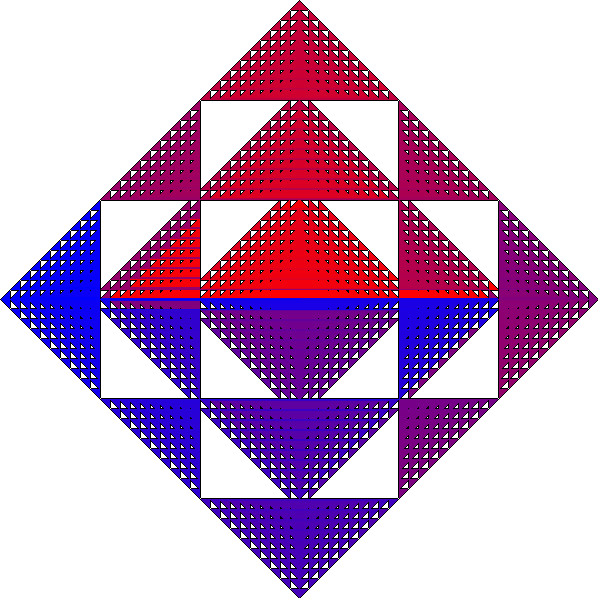 | 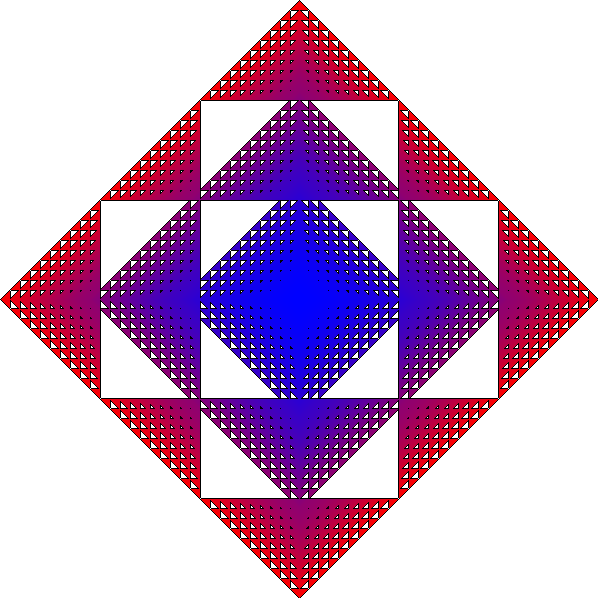 |
We see the same patterns here as we did in the sequential images: the depth first starts to the left then rotates counter-clockwise. Breadth-first starts in the middle and works out.
So we’ve solved the problem (more or less, we haven’t actually counted the number of points in the grid). But what else can we use this framework for? Well, first let’s build a helper function to abstract anything we might want to do with these:
(define (make-grid default-param function)
  (λ (              [param default-param]
      #:steps       [steps (expt 2 15)]
      #:depth-first [depth-first #t]
      #:gradient    [gradient    #f])

    (define grid
      (monkey-grid
       (function param)
       steps
       #:depth-first depth-first))

    (infinite-grid->bitmap
     grid
     (if gradient (make-gradient-coloring grid) default-coloring))))
This is another function generating function. In this case we want a default parameter and a function of the form (number? number? -> boolean?). For the inner function, we have that parameter we defaulted earlier and three optional keyword parameters: the maximum number of steps to run (in case we want to generate a potentially infinite function), if we want to use the breadth- or depth-first, and if we want to use the gradient coloring or the original coloring. All together, it makes defining test functions much cleaner. I used this function to generate all of the images thus far in the post:
(define monkey
  (let ([digits
         (λ (n)
           (let loop ([n n] [ls '()])
             (cond
               [(= n 0) ls]
               [else    (loop (quotient n 10) (cons (remainder n 10) ls))])))])
    (make-grid
     19
     (λ (max-digit-sum)
       (λ (x y) (<= (apply + (append (digits (abs x)) (digits (abs y)))) max-digit-sum))))))
This way the default will be to sum digits no greater than 19, but we can easily generate other values. Say… 10 (we end up with a border at 19):
(monkey 10 #:steps #f #:gradient #t #:depth-first #f)

Alternatively, we can generate all sorts of nice shapes:
scheme (define circle (make-grid 50 (λ (radius) (define r^2 (* radius radius)) (λ (x y) (<= (+ (* x x) (* y y)) r^2))))) | scheme (define square (make-grid 50 (λ (radius) (λ (x y) (and (<= (abs x) radius) (<= (abs y) radius)))))) |
|---|---|
 |  |
Let’s get a little crazier. What if we randomly decide at each tile if it’s viable:
(define squiggle
  (make-grid
   2
   (λ (variation)
     (λ (x y)
       (positive? (random variation))))))
Try with the default 50% change:
(squiggle #:gradient #t)
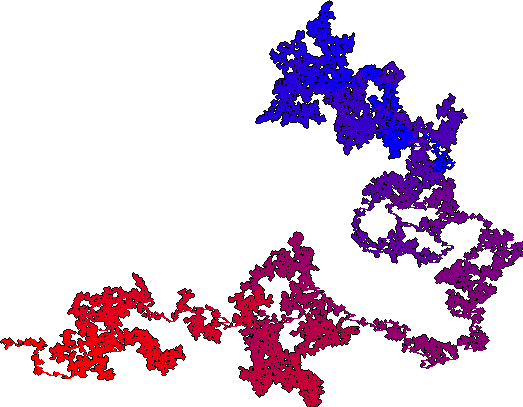
We actually got really lucky with this one. There’s a 50/50 chance that the origin itself won’t be visited, so we tend to generate a lot of empty images… (And of course each one will depend on the current random-seed. That was the default depth first version, so we (more or less) see the continual forward motion. Here’s one that’s breadth-first:
(squiggle #:depth-first #f #:gradient #t)

We can still see the definite outwards pattern here, along with which branches it generate later (those to the left in this case).
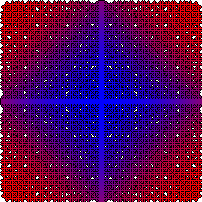
Next, how about visualizing prime numbers?
(require math/number-theory)
(define either-prime
  (make-grid
   +inf.0
   (λ (bound)
     (λ (x y)
       (and (<= (abs x) bound) (<= (abs y) bound)
            (or (<= -2 x 2) (<= -2 y 2)
                (prime? x)  (prime? y)))))))
We have to allow numbers less than 2 or we’ll never get away from the origin. In this case, math/number-theory
considers negative numbers to be prime? if their abs is prime?, so we get some nice symmetry.
(either-prime 100 #:gradient #t #:depth-first #f)
For those playing at home, here’s a bigger one (remember, click to embiggen):
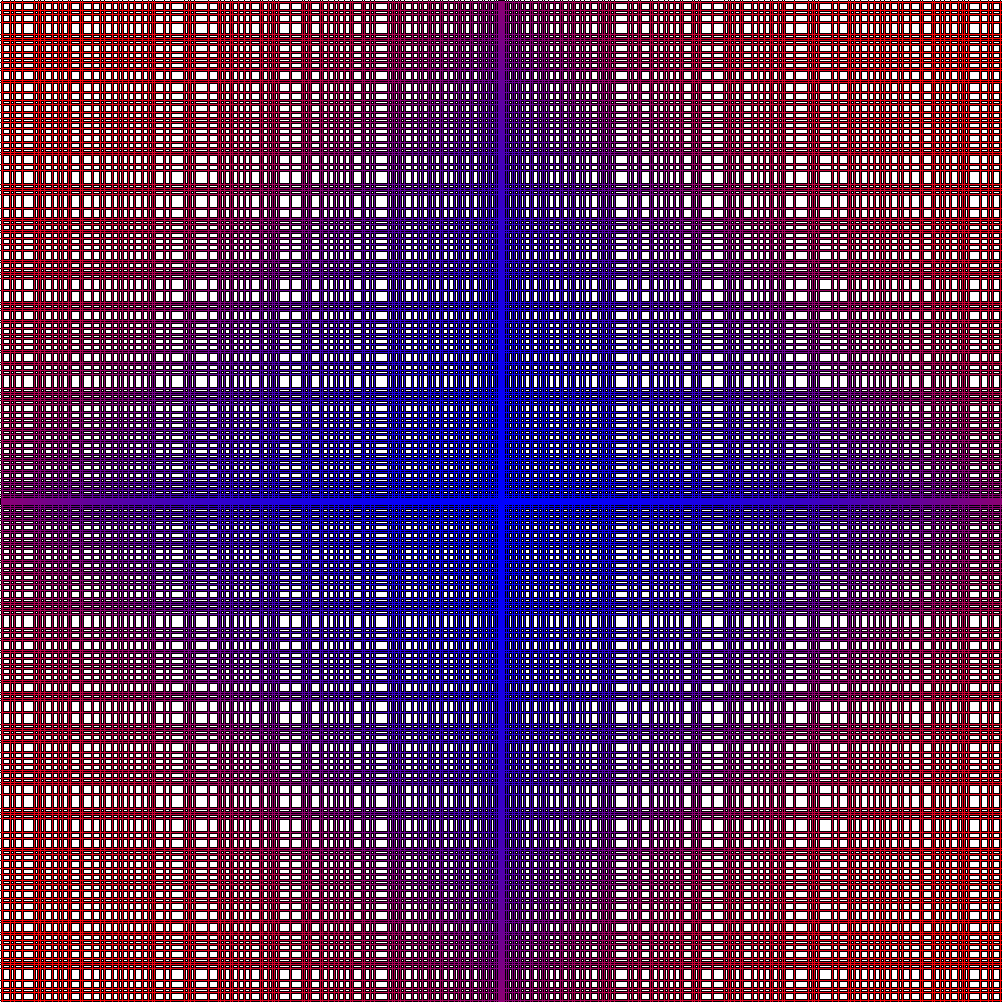
Another option would be to check if x and y are coprime:
(coprime 100 #:gradient #t #:depth-first #f)
| Depth-first | Breadth-first |
|---|---|
 |  |
There is definitely some interesting structure going on. 😄
I think that’s about it for now. If you have any other interesting functions you’d like to check out, go ahead and give the code a spin (GitHub: jpverkamp/small-projects/monkey-grid.rkt) and/or drop me a line in the comments. I’d love to see what else people come up with!