Last time, we started with writing the ascii canvas we’ll use as our GUI. Now we get to start the tutorial itself. Toady we have a four part goal:
- Create the initial GUI, including an ascii-canvas
- Create a ‘screen’ abstraction to handle the current game state (menus, inventory, and the game itself)
- Deal with input from the user and changing between screens
- Draw an @ on the screen that can move around (the Roguelike equivalent of hello world)
So let’s get to it!
(If you’d like to follow along, you can can see the full source code here: just day 1, everything so far)
Creating the GUI
The first thing that we want to do is create a barebones GUI. The earlier we can get things up and visible, the easier it will be to debug. Theoretically (since we’re writing a roguelike) we could write this to run directly in a terminal, but since I already have a custom ascii canvas, I might as well use it.
So the first thing to do is create a frame:
; gui.rkt
(require
 racket/gui
 racket/draw)

; Create a new GUI.
(define gui%
  (class object%
    (init-field width-in-chars
                height-in-chars)

    ; Create the frame.
    (define frame
      (new frame%
           [label "Racket Roguelike"]
           [style '(no-resize-border)]))

    ; Make everything visible
    (send frame show #t)

    ; Finish initilization.
    (super-new)))
Which you can then create by running this:
(new gui%
     [width-in-chars 40]
     [height-in-chars 24])
Well, where is it? So… we didn’t actually set a default width or height, so it’s hiding somewhere. Likely it’s just a one pixel square. We could fix that by passing more parameters to the (super-new) call, but instead, why don’t we go ahead and add the canvas? (It automatically sizes the frame containing it).
Adding an ascii-canvas
All we need to do is add the code to create the canvas right after we define frame. By passing frame as the ascii-canvas' parent parameter everything gets linked up nicely. Something like this:
; Create the ascii canvas
(define canvas
  (new ascii-canvas%
       [parent frame]
       [width-in-characters width-in-chars]
       [height-in-characters height-in-chars]))
Run it now and this is what we get:
That’s actually not bad at all. At least it looks like a real program now.
Creating the screens
Next, we’re going to take a bit of a break to set up a nice abstraction for a foundation. We want to be able to keep the game logic for different phases of the game seperate, so to do that, we’re going to use the concept of screens. Each screen% will have two methods that the main GUI will call:
(update- update the screen when user input is received, return the next screenkey-event)(draw ascii-canvas)- draw the screen using ascii-canvas when the GUI needs to refresh, given an ascii-canvas
In terms of code, we want this class:
; screen.rkt

; An abstraction for a single in game interface
;   inventory, menus, game screen, etc.
(define screen%
  (class object%
    ; Called when the user pressed a key
    ; Should return the screen to use for the next tick (often 'this')
    (define/public (update key-event)
      (error 'screen% "override this method"))

    ; Called when the GUI needs to draw this screen
    ; Passed an ascii-canvas to draw to
    (define/public (draw canvas)
      (error 'screen% "override this method"))

    (super-new)))
The main menu screen
To make use of this, the first thing that we want to implement is a main menu. We’re just going to go with something really simple:
; main-menu-screen.rkt

(require
 "screen.rkt")

(define main-menu-screen%
  (class screen%
    ; Always turn control over the game screen
    (define/override (update key-event)
      ; TODO: (new game-screen%)
      this)

    ; Just draw a basic menu
    (define/override (draw canvas)
      (send canvas clear)
      (send canvas write-center "Racket Roguelike" 10)
      (send canvas write-center "Press any key to continue" 12))

    (super-new)))
Easy enough. And now we have enough that we can start attaching this to the main GUI. First, we’ll need to add the active screen as a private field to the GUI.
; gui.rkt

; The active screen
(define active-screen (new main-menu-screen%))
I put it right after I defined canvas. Next, we want to do the initial draw. Since each frame is response for clearing itself, all we need is this (I put it right before the super-new call):
; gui.rkt

; Do the initial drawing
(send active-screen draw canvas)
(send frame refresh)
And with that, we have the initial GUI:
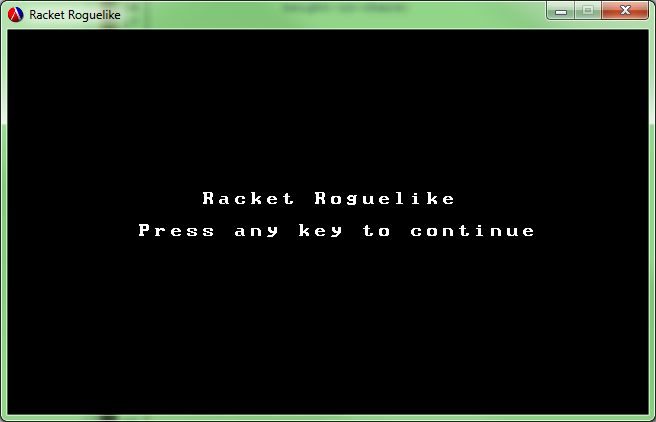
Pretty good. Although it says that we can press any key to continue… So we should probably actually implement that.
Dealing with user input
This is actually one of the more complicated bits. By default, the ascii-canvas doesn’t actually handle any input. So what we need is a new class with all of the properties of an ascii-canvas but with added keyboard support. Even better, we want it to share scope with the active-screen variable so we can implicitly use that.
What we need is an anonymous super class for ascii-canvas that overrides the on-char method from canvas%. Something like this:
; gui.rkt

; Create the ascii canvas
(define canvas
  (new (class ascii-canvas%
         (inherit-field
          width-in-characters
          height-in-characters)

         ; Process keyboard events
         (define/override (on-char key-event)
           (case (send key-event get-key-code)
             ; Exit the program
             [(escape) (exit)]
             ; Ignore key release events and pressing alt
             [(release menu) (void)]
             ; Pass everything along to the screen
             ; Update the screen to whatever it returns
             [else
              (set! active-screen (send active-screen update key-event))
              (cond
                ; If it's still a valid screen, redraw it
                [(is-a? active-screen screen%)
                 (send active-screen draw this)
                 (send frame refresh)]
                ; Otherwise, exit the program
                [else
                 (exit)])]))

         ; Initialize the ascii-canvas fields
         (super-new
          [parent frame]
          [width-in-characters width-in-chars]
          [height-in-characters height-in-chars]))))
It looks a little strange, but it works great. Theoretically, I could also use something like mixins
, but I’m not familiar enough with them at the moment. Alternatively, I could set up ascii canvas so that it takes a keyboard input function as a parameter. Hmm. Perhaps another day.
If we run it again, we get something that looks exactly the same. And it still doesn’t do anything (since the main-menu-screen% code doesn’t actually do anything yet…). So we need another screen to change to.
The main game screen
Well, it’s time. Let’s make the player. First, we want an abstraction for locations. I saw this in another blog series, although unfortunately I don’t remember where at the moment. Basically, why make a struct for points when imaginary numbers work just fine? All you need is a few simple re-definitions (technically you can do without, but it makes it easier):
; game-screen.rkt

; API to use imaginary numbers as points
(define pt make-rectangular)
(define pt-x real-part)
(define pt-y imag-part)
Why would we want to do this when a simple struct ((define-struct pt (x y))) would give us the same three methods for a single line? Well with the struct, you can do either of these:
> (pt-x (+ (pt 0 0) (pt 2 0)))
2
> (pt-x (* 5 (pt 2 0)))
10
I’m sure that there are all sorts of useful things I’ll be able to do with that. At the very least, it will make this method nice to write:
; game-screen.rkt

; Convert real coordinates to canvas coordinates
(define (recenter canvas orig)
  (+ orig (pt (quotient (send canvas get-width-in-characters) 2)
              (quotient (send canvas get-height-in-characters) 2))))
Basically, this lets us recenter points so that (0, 0) is the center of the canvas rather than whatever the actual midpoint is. This should make things much easier if/when we get to scrolling maps!
So with that, what does it take to create the game screen? Not much at all!
; game-screen.rkt

(define game-screen%
  (class screen%
    ; Store the player's state
    ; Use an imaginary number for a point
    (define player (pt 0 0))

    ; Process keyboard events
    (define/override (update key-event)
      ; TODO: Handle keypresses
      this)

    ; Draw the game itself.
    (define/override (draw canvas)
      (send canvas clear)

      ; Draw the player
      ; 0x0 is the center point of the canvas
      (let ([player (recenter canvas player)])
        (send canvas write #\@ (pt-x player) (pt-y player))))

    (super-new)))
And we also need to change the main menu screen so that it switches to the game screen when you press a key. All you have to do is replace the update method:
; main-menu-screen.rkt

; Always turn control over the game screen
(define/override (update key-event)
  (new game-screen%))
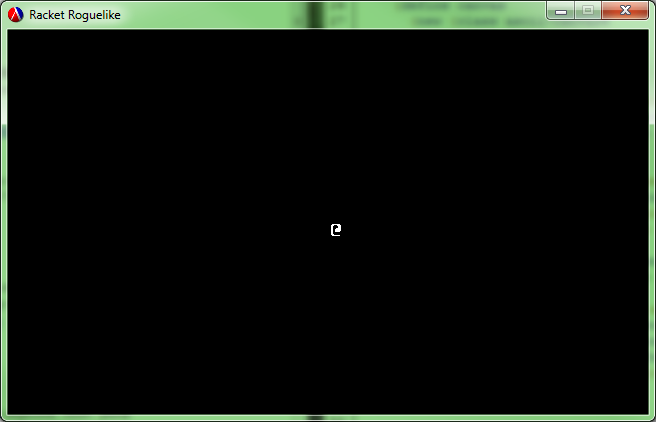
And if we run it (and hit any key on the main menu), we now have a little @. Basically, it’s the roguelike version of a hello world.
Last but certainly not least, we want to be able to make the @ move around. Luckily, we already have everything we need. I’m going to go ahead and add support for the arrow keys, numpad, and WASD. This could just as easily be loaded from a configuration file, perhaps I’ll do that in a later post.
In order to get this working, we need to replace the update method in game-screen% with something like this:
; game-screen.rkt

; Process keyboard events
(define/override (update key-event)
  ; Move the player
  ; NOTE: Y axis is top down, X axis is left to right
  (case (send key-event get-key-code)
    [(numpad8 #\w up)    (set! player (+ (pt  0 -1) player))]
    [(numpad4 #\a left)  (set! player (+ (pt -1  0) player))]
    [(numpad6 #\s down)  (set! player (+ (pt  0  1) player))]
    [(numpad2 #\d right) (set! player (+ (pt  1  0) player))])

  ; Keep the state
  this)
And it works great:
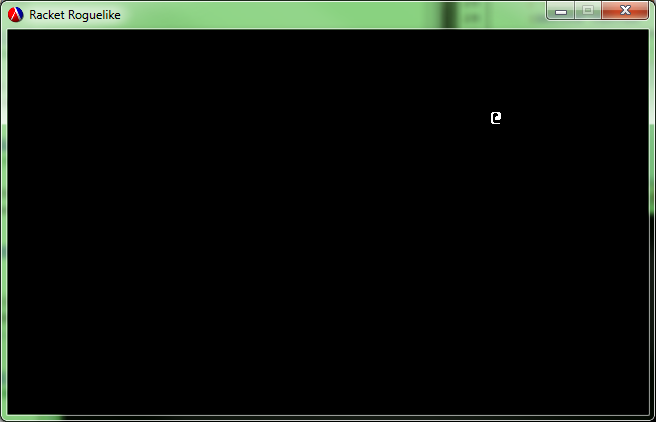
Unfortunately, it breaks (rightfully so) if we walk off the screen with this lovely error message:
write: contract violation
  expected: y in the range [0, 24)
  given: -1
Oops. We’ll fix that in a later post when we also add in scrolling.
And that’s everything for today. So far, we ‘only’ have a trivial main menu and a moving @, but it turns out that’s a fair chunk out of the way. It’s actually only 164 lines of code (498 counting ascii-canvas.rkt) and that includes comments and whitespace. If you cut out those, it’s only 109. I wonder how that compares to other languages?
Now that we’re done, if you’d like to see all of the code for this project, you can do so on GitHub:
If you’d like to try it yourself, you’ll need to have both Git and Racket and run the following series of commands:
git clone git://github.com/jpverkamp/racket-roguelike.git
cd racket-roguelike
git checkout day-1
git submodule init
git submodule update
racket main.rkt
Edit:
It seems that the submodules wondered off at some point. Instead, you can install the three libraries this uses directly using pkg
, and then run the code:
raco pkg install github://github.com:jpverkamp/ascii-canvas/master
raco pkg install github://github.com:jpverkamp/noise/master
raco pkg install github://github.com:jpverkamp/thing/master
git clone git://github.com/jpverkamp/racket-roguelike.git
cd racket-roguelike
git checkout day-1
racket main.rkt
If you want the most up to date code instead of just today’s, just remove the third line. Eventually I’ll include pre-compiled binaries, but they just wouldn’t be that interesting as of yet.
For part 2, click here: Racket Roguelike 2: Infinite caves!